
Trimmin' the Hedges
This car has a lot of shiny bits of stainless trim. Front fenders, rear fins, doors, sides... That stuff is everywere. Plus, it takes a shockingly long time to do even a half-assed polishing job, let alone pop out the dents and dings. Something like thirty minutes per spear... eight spears... four hours with the polishing wheel on the dremel. FML.
Screw it, the dents and dings can stay - it's all classy patina anyway. This isn't meant to be a concourse competitor, let's just get out and drive!

Screw it, the dents and dings can stay - it's all classy patina anyway. This isn't meant to be a concourse competitor, let's just get out and drive!
Half Way Done!
Scorchin' the Earth
The big job inside the car has by far been pulling out the asphalt sound damping. This stuff somewhat resembles roofing underlayment, and I am wary of its effectiveness compared to modern constrained layer dampers (Dynamat and the like). So, I begged and pleaded and eventually convinced the beautiful girlfriend (you met her in a previous installment) to crawl inside with a spray bottle of mineral spirits, a scraper, and rubber gloves. After many (many many many) hours of scraping, chipping, and soaking, the floors are nice nekkid paint - albeit slightly scraped.


The metal is quite solid, with no evidence of deterioration on the underside. I have high hopes that it will last several years living in a garage in the desert. Future John promises to follow up on the longevity of the rust encapsulator.
Before
After
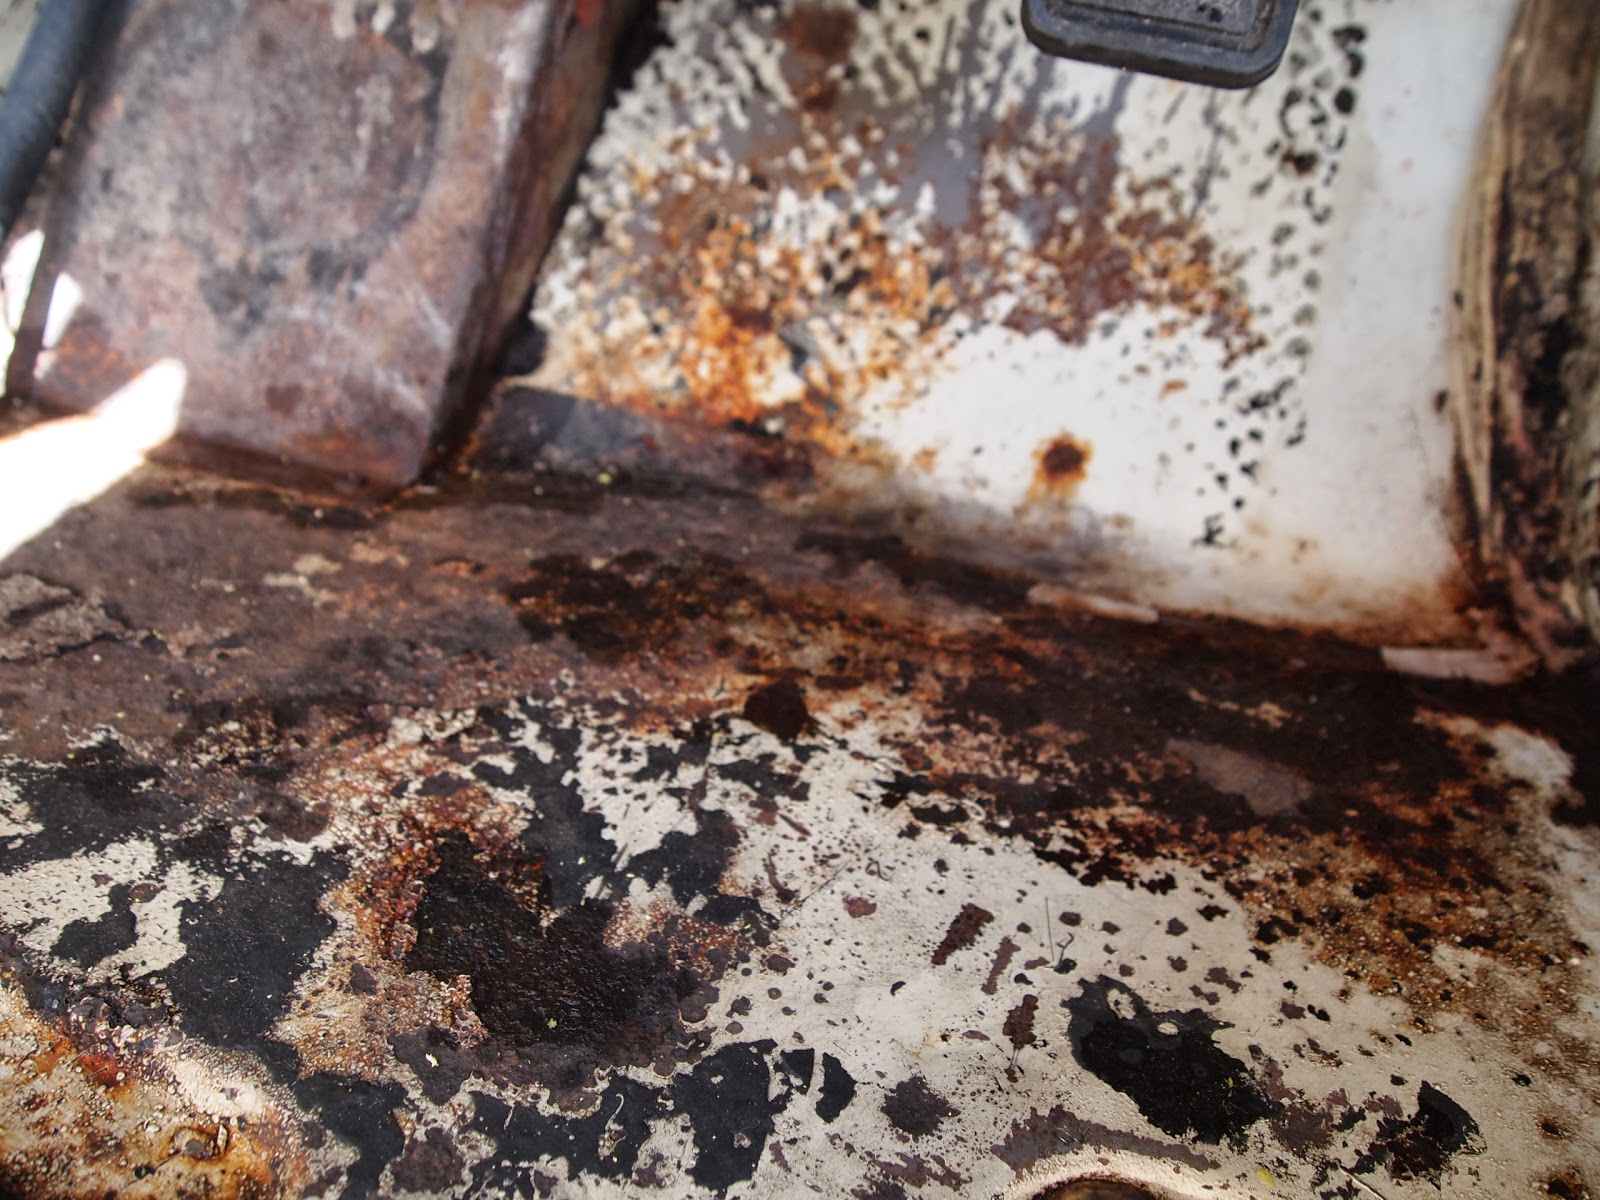
As you could expect, pulling up ancient sound damping revealed some flaws underneath. The biggest problem area being underneath the pedals. It appears water ingressed through the air inlet at the base of the windshield and sat at the base of the firewalls on both sides resulting in some rather serious surface rust. Being the detail-oriented guy that I am, after some serious integrity tests of the underlying metal (consisting of some finely calibrated pokes with a phillips head screwdriver), I swept the issue under the rug. Also, under a heavy coat of Eastwood Rust Encapsulator. Future John will be in a far better position to work on it than Present John (Dear Future John: Sorry 'bout getting lazy on the floorboards. Also, sorry 'bout that donut I had with breakfast. I hope you understand).
Another before and after shot:
Polishin' the Knob
Oh right, we covered this already.

...
Let's just move on.
Splatterin' the Bugs
As I'm sure I've mentioned in several angry rants in the past, I broke the windshield the car came with. It wasn't the end of the world and it was an aftermarket part anyway, but it definitely hurts in the already bruised and battered pocketbook. Luckily, VP-Autoparts has them available at almost half the price of the dealership. As with iRoll, they were an absolute pleasure to deal with, getting me a well packed windshield within a week and saving me a healthy chunk over going to fast glass or the dealership.
To preface this, everything I know about installing windows I learned from YouTube. Anything you could possibly need to learn has been recorded and is waiting for you watch. Need to sync a pair of SU carbs? No problem. Re-sole an old shoe? Been done, by a cat no less. Install a windscreen in your classic car? Gotcha covered! Prepping the windows for installation starts with mounting the gaskets, a time intensive process requiring a lot of patience, a little bit of cursing, and a bit of lube. Interestingly, this same advice applies everywhere in life, car repairs, plumbing, cooking on hard anodized pots and pans, relationships, you name it.

Easier Job with Six Hands
I mounted the trim on the gasket before installing the whole assembly on the car and am glad I did. It was challenging enough getting the trim mounted when I had easy access all the way around the window, I can't imagine trying to hold a piece in place while walking to the other side to keep working the trim in.
Mounting the window into the car takes the same holy trinity. Start by running a cord (I used weedeater cable) through the groove that fits inside the car. Give a decent spritz of silicon lube to the window opening. Set the window in place. Pull the cable out through the groove while simultaneously slapping (not hammering, punching, or hitting) the outside of the window to jostle it into position. If you do this right, you'll get the inside lip of the seal around the inside of the window frame and will be done! If you don't, you'll lose the lip at some point and have to start over (and over, and over, and over). Again, the help of a beautiful assistant is instrumental in achieving success. The more beautiful the assistant, the more successful your installation will be, according to my research on the subject (and I have a 100% success rate).

Mounting the window into the car takes the same holy trinity. Start by running a cord (I used weedeater cable) through the groove that fits inside the car. Give a decent spritz of silicon lube to the window opening. Set the window in place. Pull the cable out through the groove while simultaneously slapping (not hammering, punching, or hitting) the outside of the window to jostle it into position. If you do this right, you'll get the inside lip of the seal around the inside of the window frame and will be done! If you don't, you'll lose the lip at some point and have to start over (and over, and over, and over). Again, the help of a beautiful assistant is instrumental in achieving success. The more beautiful the assistant, the more successful your installation will be, according to my research on the subject (and I have a 100% success rate).
Now you can spend a few relaxing hours cleaning the glass while your beautiful assistant celebrates the couches she discovered buried for centuries under your old windows...
Stay Tuned!
We're very close to being on the road with this thing. Insulation, carpets, seats, and interior panels are all I need to get back on the road! Then I can dig into fixing the heater, replacing the bushings, shocks, and brakes, and installing a radio.
Man, there's gonna be so much to write about.