

You've seen this before...
Step 1 - Polish the Bits:
With the right tools it turns out polishing up the old gauges is really quite easy. To start with, I gave them a quick scrubbing with some 409 (careful not to get any cleaner or water inside, who knows the havoc that would be wreaked) to get some of the surface crap off. After that, it was copious amounts of quality time with the dremel and a polishing wheel. One more trick: after cleaning, rub some baby oil into the faces to minimize cracks and really make them glisten. Oh, you want before and after pictures?


Old and Busted.
New Hotness.
Yeah, they clean up nice. While somebody more knowledgeable than I in the metallurgic arts could go into details as to why, I'll chalk this one up to them not being made of chromed plastic. Now to figure out what works and what doesn't. Thanks to some wonderful help on the Yahoo Groups 1800 list, I was able to repair the clock (more on that later), and the oil and fuel gauges worked out of the box. The tachometer was bypassed sometime in the past when an aftermarket ignition coil was installed in a wonky location. The speedometer might work, I'll find out when I can get the car up to speed (or when I chase down the cable and hook it up to the drill). Temperature gauges are a different story, being detached from their usual locations in the engine bay. I suppose I'll just have to be careful and I dunno... drive in the cold for the time being.
Shiny!
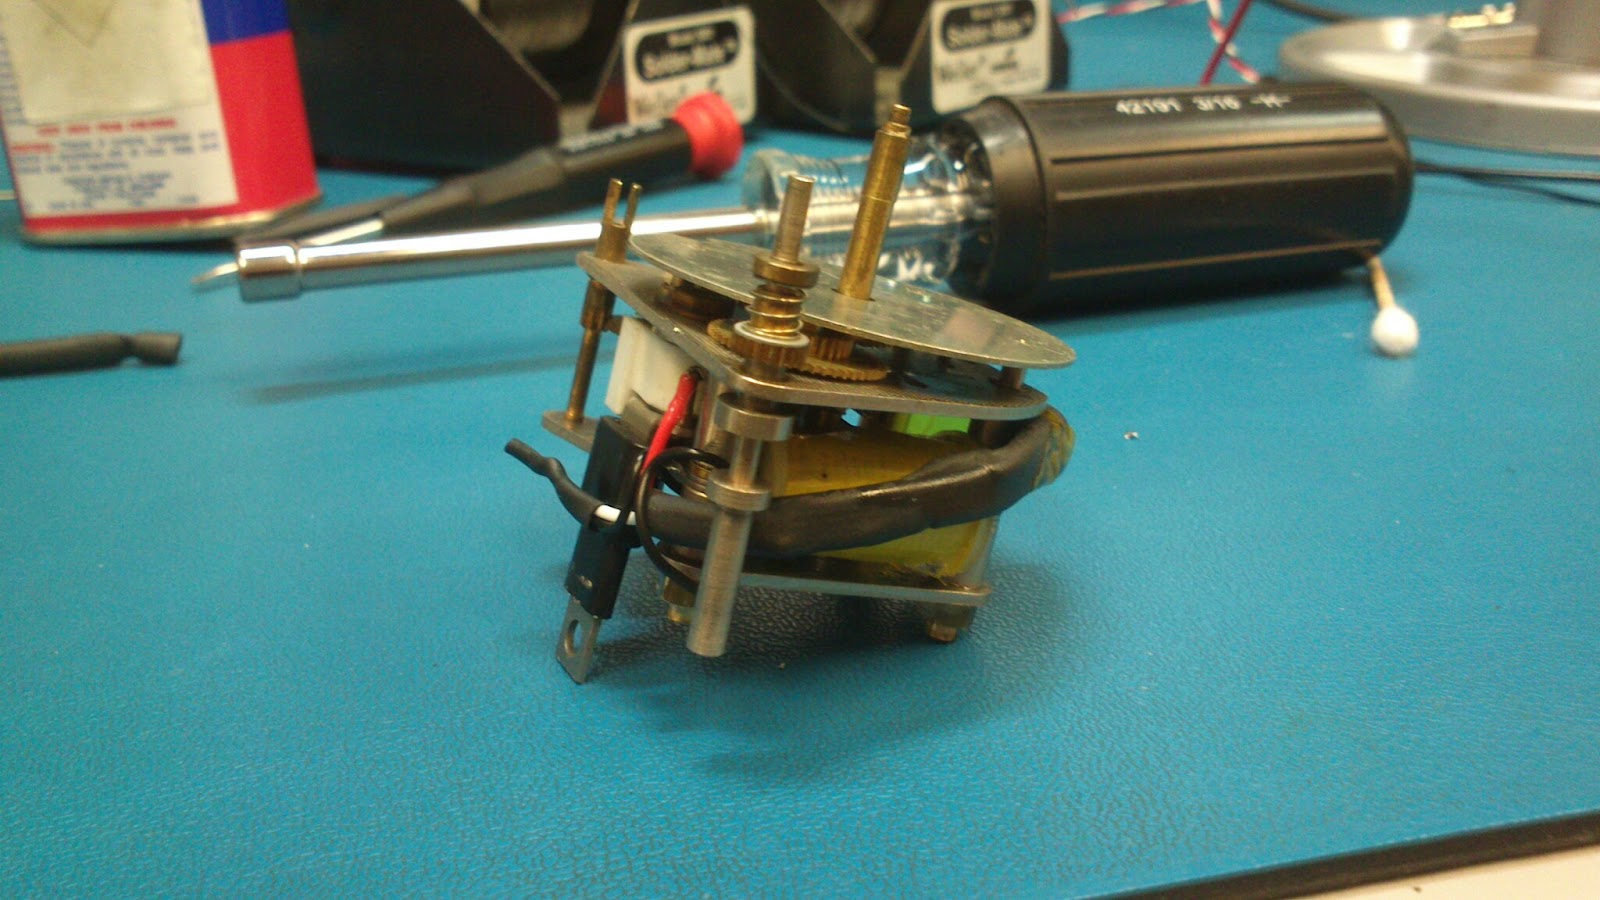
Keeping Time
It seems these clocks never work longer than a year or two. Rather than a quartz controlled device, they are a finely balanced electromechanically driven mechanism requiring the near perfect function of some very fine parts. As they say: they don't make them like they used to... And there's probably good reason for that... However, these clocks are just too cool for me to let die an inglamorous death, forever stuck at 3:26, a gorgeous but non functioning relic of the past. Luckily for us, an intrepid member of the community sorted out the root cause of the clock failures and rigged up a solution! Armed with this new knowledge and a full bin of electronic parts from EE 201 a decade ago, it was time to dig in!
First hurdle: These clocks are not designed to be opened. The bezel is literally bent around the backside to hold the thing together. Thirty minutes of savage twisting with a screwdriver freed the clock from it's shiny confines and gave me these beautiful guts:
Brass Clock Guts
The root cause of these clock failures is a a reciprocating balance wheel driven by an electromagnet. To discharge the magnet's capacitor, a fine wiper sweeps brushes against a contact, closing the circuit and allowing the balance wheel to change direction. The above description is more or less entirely inaccurate, but the gist of it remains: too much current through too small a contact in too short a time. To resolve this, a transistor circuit is added. In this setup, the transistor basically works as a relay allowing the wiper to draw a tiny fraction of the current it used to, with the transistor sinking the rest of it. Two resistors, a transistor, and some wires are all it takes (extra special thanks to Bill Jackson of the Yahoo group for drawing this up!).
Circuit Wired In
Only time will tell if it keeps time (hehe, I slay myself), but the clock has been running without issue since installing it two months ago.
Now I just need to put them all back together...
Remember, don't let this guy near any power tools.
No comments:
Post a Comment